This week I’d like to share some interesting information about Google Maps and unveil a new free tool.
Google Maps needs no introduction, I’m sure everyone reading this blog is very familiar with it and has used this service from Google many times. Google Maps can play a big part in an investigation, whether it’s a runaway youth, a kidnapping, luring, or a homicide. If a child has looked up directions to meet up with someone they met on the Internet, this can provide some great leads for an investigator. Similarly, a killer who is looking for a place to dump a body could use Google Maps to find a “good” location and will leave tracks behind on their computer.
Google Maps uses a tile system to display maps. Each tile is downloaded and pieced together to display the complete map, and has a “x,y” coordinate as well as a zoom level. When using Internet Explorer, these tile files will be saved in the Temporary Internet Files folder(s) in a couple filename formats:
lyrs=m@196000000&hl=en&src=app&x=5&y=8&z=4&s=Galileo[1].png
&x=5&y=8&z=4.png
Both formats include the x,y,z (zoom) coordinates. Each tile file is 256×256 pixels and as you can imagine (depending on the zoom level) it’s hard to get a good idea of where on the map the user was looking, based on that one tile. Some investigators have had to go through the tedious process of manually piecing tiles back together or trying to locate a tile file on Google Maps.
Today we’re releasing a new (free!) tool called Google Maps Tile Investigator (GMTI). What this tool will do for you is take a tile’s x,y,z coordinates and download the surrounding tiles for you, displaying them in a similar fashion that Google Maps would. It can also convert that x,y,z data to the latitude, longitude coordinates and then open Google Maps in your default browser with those coordinates.
The other helpful feature is the ability to search through a folder/subfolders for filenames that match the Google Maps filename format and pull out the x,y,z coordinates for you, again with the option of converting them to their latitude, longitude coordinates.
Here are some screenshots with descriptions:

This is the main screen of GMTI. Here you are either manually enter x,y,z coordinates (an example provided) and view it within GMTI with surrounding tiles, or you can launch your default browser and view the latitude, longitude for the x,y,z coordinates. If you choose to view the tile with surrounding tiles you’ll get a view similar to this:
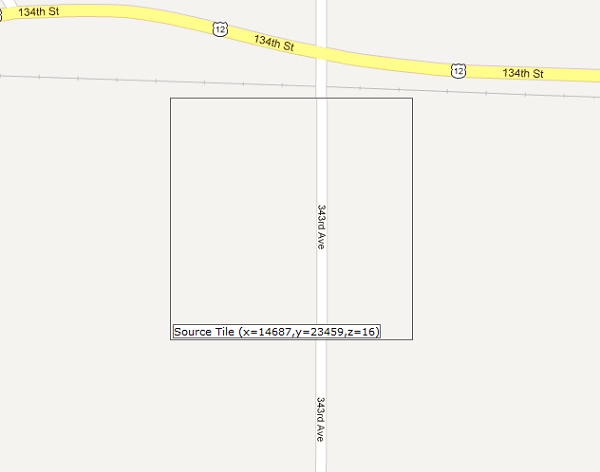
This is a condensed view, but you’ll see that the selected/source tile is highlighted and the surrounding tiles have been downloaded from Google. You are able to move left, right, up, down, and zoom in and out using controls at the top right, and take a screenshot using the “Save” button (not visible in this screenshot).
The other option is to have GMTI search a folder/subfolders for file names that match the format Google Maps uses for its tile files. Below is a screenshot of what you could find using that option and searching a user’s profile folder:
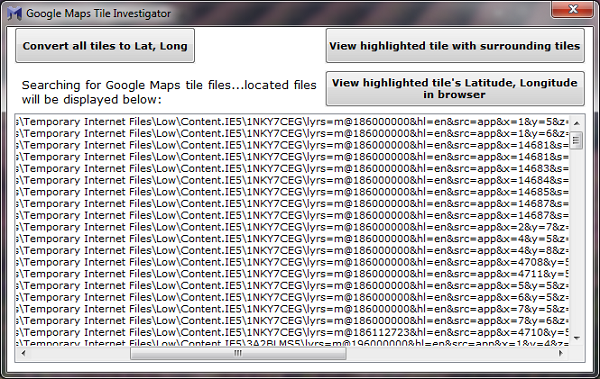
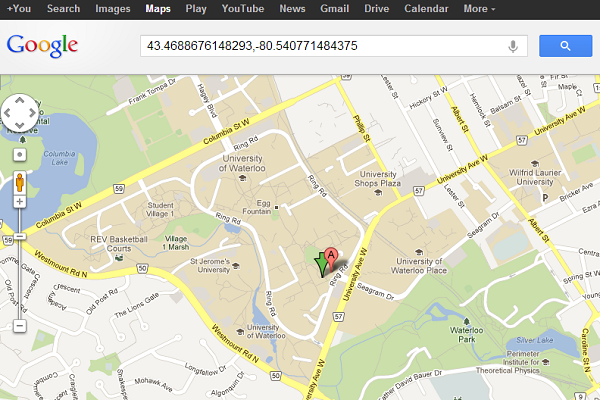
As you can see, a number of files were found in IE’s temporary internet files folders. From here you can highlight a file and view it internally along with surrounding tiles, or (again) view the location of the corresponding latitude/longitude in your default browser via Google Maps. If you choose the latter option, you’ll get a view similar to this:
Finally, if you’d like to get an overview of what someone was searching for or mapping out, the “Convert all tiles to lat, long” button on the previous GMTI screenshot provides a cool ability. In our example, you’ll get a screen like this:
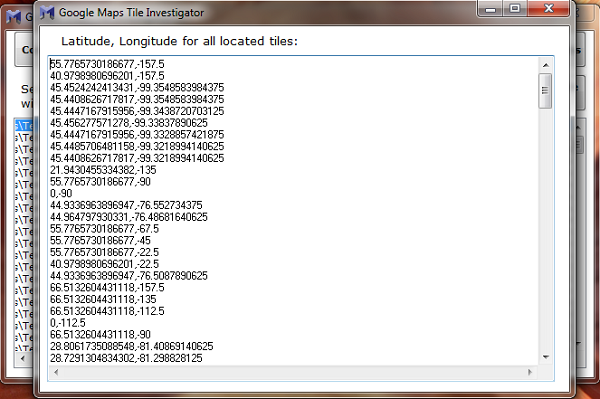
Now that we have this data, we can copy it all and paste it into a website that will plot all these points onto a Google Map view. This is a site I’ve used that “just works”, but I’m sure there are others you can try: http://www.darrinward.com/lat-long/
Here’s the view you get and if you try this out yourself, you’ll see that as you zoom in you start to see clusters of points which quickly indicate to you where someone has been searching or exploring on Google Maps:
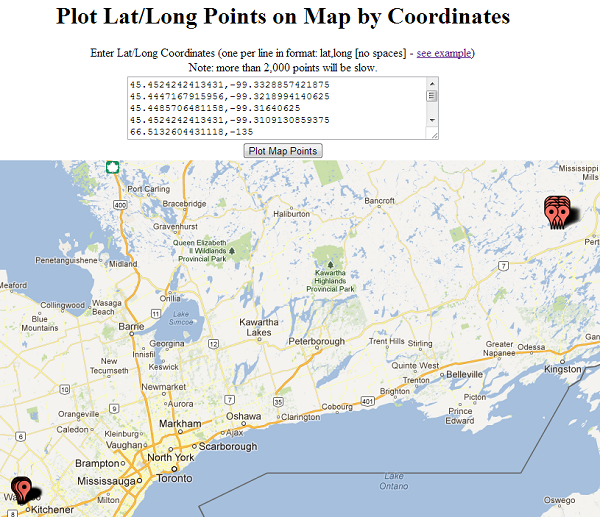
In the zoomed out view, you’ll likely see points in the ocean and other locations that don’t make sense. These are just tiles that were downloaded when someone was in the the fully zoomed-out view.
Hopefully that gives you a good idea of how to use our Google Maps Tile Investigator and how it can provide some valuable information in various investigations.
In IEF v5.8 we’ll be incorporating these features and taking it a level further, providing you with as much data regarding Google Maps usage as possible, and making it easy for you to get to this data. Be on the look out for v5.8 in January 2013.
Download
Now to the important part. ![]() To download GMTI, please go to the Google Maps Tile Investigator v1 page.
To download GMTI, please go to the Google Maps Tile Investigator v1 page.
Thanks for tuning in this week and I hope you found this post useful and that GMTI will come in handy for you in your investigations.
Have a great week and happy holidays to everyone!
Jad